
This third blog post in my Workshop Build series brings you along as I follow the first about the very beginning and the foundation, the second one about the framing, sheathing, and roofing – essentially constructing the shell – with this one recounting the finishing of the exterior with the siding and doing the electrical wiring.
Accompanying photos can be found in the Gallery III here on the website.
I’m appreciative to Lew Beaudrot, Don Masden, and Make French for their assistance in helping to get the siding on perfectly, and for helping carry those 12 foot long Hardie Board siding boards that are about as limp as an aldentè spaghetti noodle! It was tricky getting them up without them snapping. When I said the siding went up perfectly, I mean perfectly! With Lew’s laser level and copious amounts of measuring and remeasuring, those boards were perfectly spaced from bottom to top with a 7″ reveal, they were level from left to right, and by the time we had made it all the way around and back to the front left, they matched up exactly! Fitting them in around that short breezeway roof was challenging, to say the least, but we were up for it and it turned out marvelously well.
I also decided to build a small ‘roof’ over the barn door rail. Lew and I hung the rail and framed the small roof and I roofed it… complete with underlayment, flashing, drip edge, and two rows of shingles. It’s just another small detail that I think will pay dividends in the long run by protecting my barn door rail, rollers, and door from the elements.
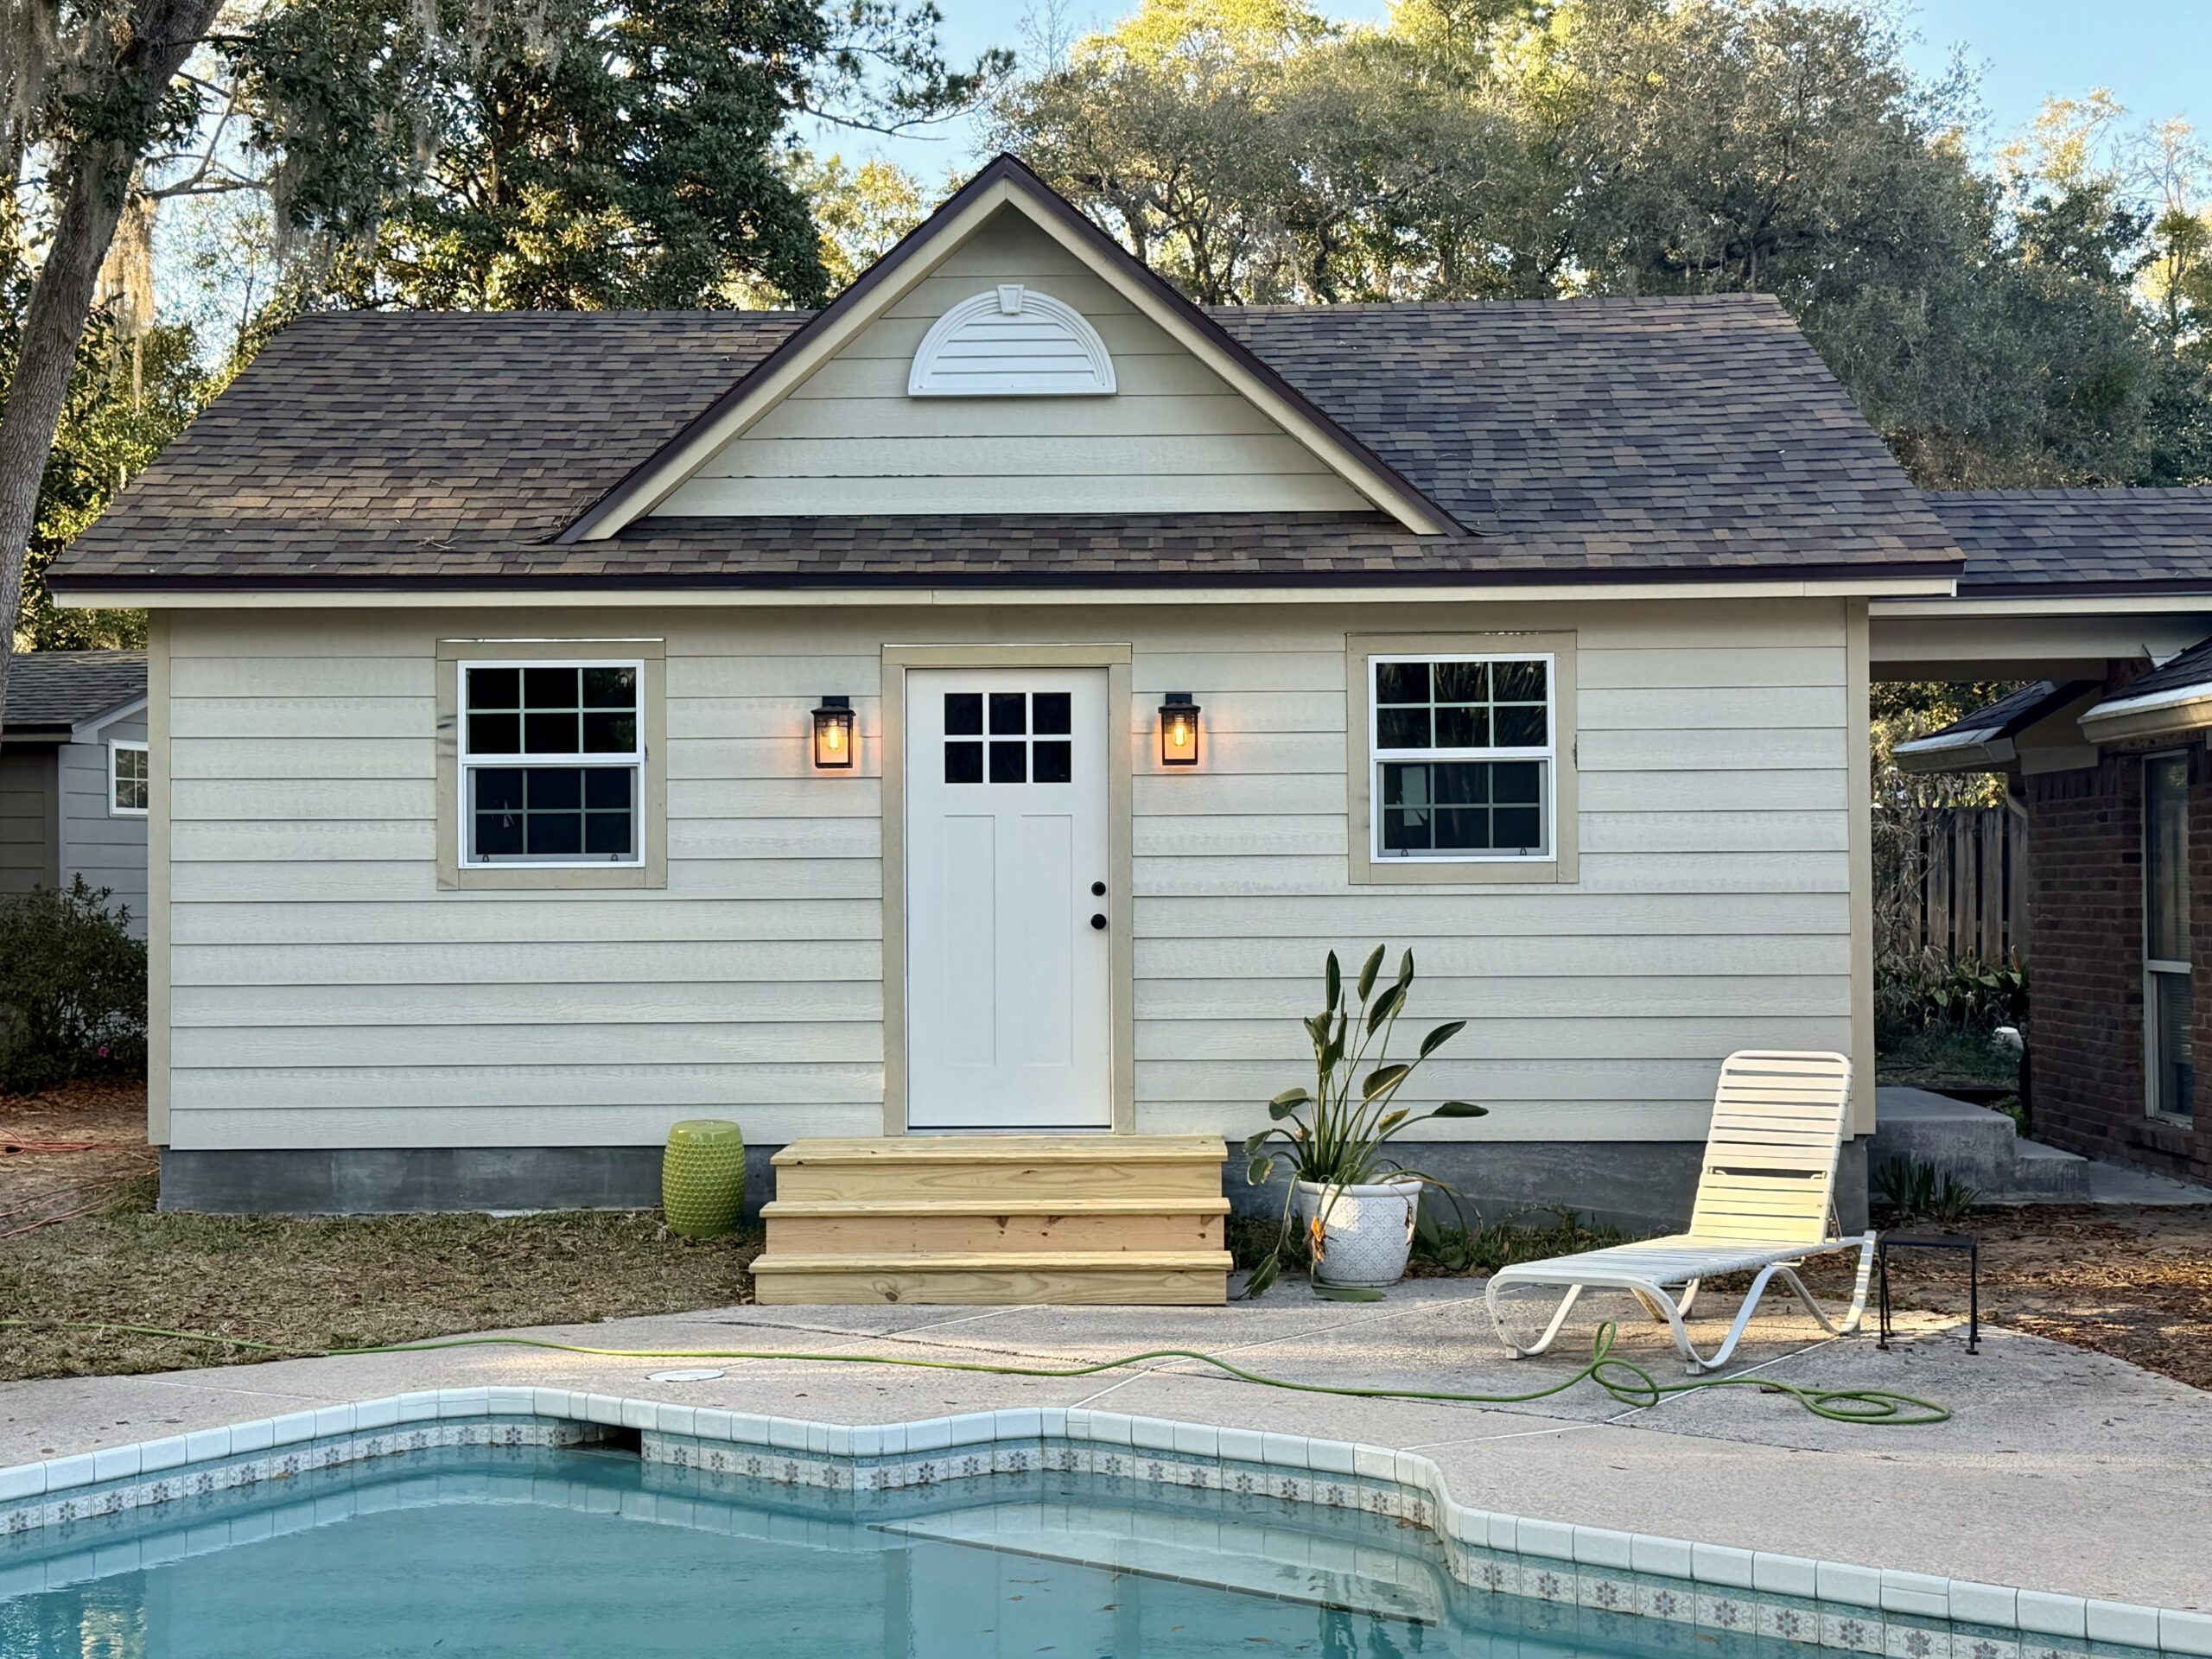
I chose to make the outside as decorative as possible, belying the fact that the inside was, by most definitions, modest; it is, after all, a workshop. I wanted the outside to be something that was pleasant to look at, considering that it occupies a prominent position in the backyard. To that end, I used a decorative ‘vent’ in the front faux gable dormer, and straight-edge, shingle siding panels in the 2 end gables. We installed the decorative vent by first positioning it in place after tracing it and making a cardboard template. We were then able to cut the roof angles and measuring the siding boards, and then using the cardboard template to very carefully trace the curves on the other end. It worked like a champ and even drew a compliment from my inspector!
Church relationships emerged once again with my friend, Jamie Stowers, an electrician (now retired) helping me, or more like me helping him, do all the wiring and connecting the sub panel in the workshop to the main house panel in the garage. We installed the carriage lights outside the front door, an overhead light in the breezeway, and carefully wired the shop with circuits that spread out the receptacles to equalize the demand from all the power tools. It is a joy to watch a professional work. Jamie made it look easy; truly a professional.
I passed the framing and rough electrical inspections, and after putting in fire foam around the wires, was good to insulate and cover-up the inside walls. When the inspector left this past visit, he said I had to do only 3 things before calling for my FINAL INSPECTION. I had to 1, cover up the interior walls; 2, put steps out front; and 3, caulk the entire exterior. The first two have been completed and only the exterior caulking remains. (Actually, what he really said was, “I’ll see you at the Final!”)
Have I ever told you there’s a lot of math in construction? (Yes, I know I have… I’ve said it a lot!) Building the steps out front was both challenging and rewarding. According to code, I had to have, at a minimum, a 3′ by 3′ landing; I hade to have steps with a rise no greater than 7, 3/4″, and with a step overhang over the riser of between 3/4″ and 1, 1/4″. I chose a 12″ deep step and my rise of each of 3 steps was calculated to be 6, 3/4″. I think I turned my framing square every way I could turn it when laying out the stair stringers! Remember that math? Yep, it reared its head big-time calculating all the required code dimensions. But, as they say, all’s well that ends well.
As I type this, and as you read this post, I am well on my way to that Final Inspection with only the rest of the caulking to be done. The end is at hand of almost exactly 6 months of work on this build. The Final Inspection will officially allow me to close my relationship with the County and will allow me to legally occupy the building. There will be, however, a few remaining things to do, such as building my permanent barn door, painting the exterior, and doing some trim work on the interior, but for all intents and purposes it will be completed.
I hope you have enjoyed following along in my workshop construction. I have enjoyed recalling it, and recording it for posterity, and I am doubly appreciative that you have come to the website and invested of your time to read my posts.
I am appreciative, and I am blessed.
Comments
4 responses
As in everything, your attention to detail and your high standards for completing the job to perfection is evident. I’ve lived in houses that weren’t nearly that nice! Hope you have many years of “building and creating” in that shop. Best wishes.
Thank you, Jay. It truly is a blessing and a dream come true. I think I’m going to start calling it The Carpenter’s Shop. (The Taj Mashop just sounds far too pretentious!)
Shop looks wonderful Doug
Thanks, Joan! It’s been a labor of love, for sure.